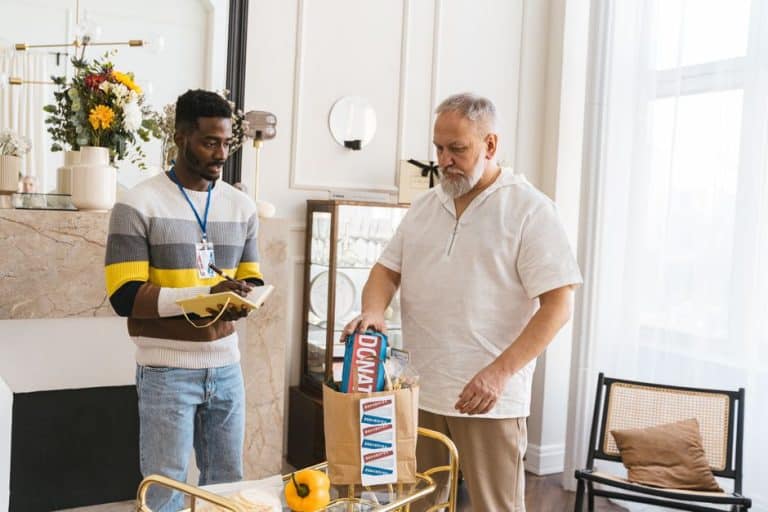
Across Aotearoa and beyond, communities are searching for projects that are both practical and socially meaningful. One quietly powerful trend sits at the intersection of sustainability, cost-of-living pressure, and connection: repair cafés and tool libraries. These initiatives help people fix items instead of binning them, share rarely-used equipment, and create regular reasons for neighbours to meet.
This roundup collects actionable ideas, examples, and resources to help community groups (and local champions) design repair-and-share initiatives that actually last. The focus is on real-world operations: how to recruit volunteers, manage risk, measure impact, and build partnerships.
Why repair-and-share initiatives are trending (and why they work)
Repair cafés and tool libraries tackle multiple community outcomes at once:
- Cost relief: borrowing a hedge trimmer once a season beats buying one (and storing it) year-round.
- Waste reduction: extending the life of appliances, clothing, and furniture reduces landfill and the emissions tied to manufacturing replacements.
- Skills transfer: retirees, tradespeople, and hobbyists share know-how with younger residents.
- Belonging: recurring events create a “third place” that isn’t work or home.
Evidence is growing that repair culture is resurging globally, driven by rising costs and greater awareness of waste. For broader context on how repair movements are scaling and why they matter, see reporting and explainers at The Guardian’s coverage of repair and reuse initiatives.
Roundup: 11 high-impact ideas to launch (or level up) a repair café or tool library
1) Start with a “pilot repair day” before committing to a permanent model
Many groups get stuck trying to design the perfect setup. A better approach: run one well-organised pilot and learn fast.
- Choose one category (e.g., small appliances + clothing mending) rather than “we repair everything.”
- Set a clear intake window (e.g., 10am–12pm drop-off, 12pm–2pm repairs) to avoid long queues.
- Record outcomes: items repaired, items partially repaired, items not repairable, and why.
Real-world tip: Even a small event with 6 volunteers can repair dozens of items in a day if intake is triaged quickly (simple fixes first, complex jobs assessed honestly).
2) Build your volunteer team around “micro-roles,” not job titles
People hesitate to volunteer if they think they must be an expert. Break tasks into approachable roles:
- Greeter/host: welcomes people, explains the process.
- Triage lead: assesses whether the item is likely repairable today.
- Fixers: electrical, sewing, bikes, woodwork (as available).
- Parts runner: finds screws, zips, spare cords, glue, etc.
- Story collector: captures before/after notes and quick quotes for impact reporting.
Momentum idea: Invite high school tech/design students to shadow fixers for service hours. It adds energy and creates a pipeline of future volunteers.
3) Use a “repair menu” to prevent overwhelm
Instead of advertising “bring anything,” publish a short list of what you can confidently handle. This protects volunteer morale and community trust.
- Good early categories: hemming, zipper replacement, button sewing, toaster cords, lamp rewiring (with qualified help), bike punctures, furniture tightening, knife sharpening.
- Categories to add later: complex electronics diagnostics, major appliance work, waterproof jacket seam sealing.
Data point you can generate quickly: After 2–3 events, you’ll know your top 10 item types. Publish that list and refine it monthly.
4) Create a simple risk and safety framework (without killing the vibe)
Repair spaces can be safe and friendly with a few non-negotiables:
- Electrical safety: only qualified volunteers open mains-powered devices; use tested RCD protection; tag and isolate unsafe items.
- Sharp tools and PPE: gloves, eye protection, and a clear “tools stay on tables” rule.
- Liability disclaimer: a plain-language sign and form (e.g., “repairs are best-effort; you accept responsibility for use after repair”).
- Child-friendly boundaries: kids welcome, but a designated waiting/activities area away from workbenches.
Practical tip: Put your safety rules on one A4 sheet at the intake desk and repeat them verbally at check-in. Consistency matters more than paperwork volume.
5) Pair a tool library with “how-to mini workshops” that match seasonal needs
Tool libraries can be more than lending; they can grow capability. Offer 20–30 minute mini workshops before or during borrowing hours.
- Spring: basic pruning, safe use of hedge trimmers, compost setup.
- Summer: bike maintenance, tent repairs, sunscreen and shade structures.
- Autumn: draught-proofing, door seal replacement, rainwater diverters.
- Winter: clothing repairs, heater safety checks, simple woodworking fixes.
Real-world example: Communities that attach a short skills component often see higher return rates and better tool care because borrowers feel more confident and accountable.
6) Choose lending rules that encourage use (not perfection)
Overly strict rules can suppress participation. Aim for a balanced policy:
- Membership: low-cost annual fee or koha option; consider concessions.
- Loan period: 3–7 days is often enough for household projects.
- Deposits: reserve deposits for high-value items; don’t deposit everything.
- Late returns: small, capped fees (or a “no-questions extension” once per year).
Actionable metric: Track “utilisation rate” (loans per tool per month). Underused items can be swapped out for more in-demand gear.
7) Build a “spare parts pantry” using community donations and smart sourcing
A lot of repairs fail due to one missing part. Create a small, organised inventory:
- Buttons, zips, thread, patches, elastic
- Assorted screws, wall plugs, bolts, washers
- Power cords, plugs (for qualified use), fuses
- Bike tubes and basic consumables
Tip: Ask local hardware shops to sponsor a “parts jar” (a small monthly contribution). It’s tangible, low-cost marketing for them and hugely enabling for you.
8) Make it social: tea, a seating area, and a “watch and learn” setup
Repair cafés are community development projects, not just service desks. Design for conversation:
- Visible workbenches so people can observe (and learn) while waiting.
- Seating clusters that encourage chats between strangers.
- Hospitality (tea/coffee/biscuits) to keep it welcoming and reduce impatience.
Practice that helps: Encourage fixers to narrate what they’re doing in simple terms. It turns “a repair” into “skills transfer,” which is the deeper value.
9) Partner with waste minimisation and social services—without mission drift
Strategic partnerships can unlock venues, funding, and referrals. Good partners include:
- Council waste minimisation teams (often interested in landfill diversion)
- Community houses and libraries (space + foot traffic)
- Marae and cultural centres (grounding initiatives in local context and tikanga)
- Budget advisory services (cost-of-living referrals)
- Men’s sheds, craft groups, and retirement networks (skills + mentors)
Guardrail: Keep your core promise small and deliverable. Partnerships should support reliability, not inflate expectations.
10) Measure impact with lightweight, credible numbers
Even basic measurement builds momentum, helps with grants, and keeps volunteers motivated. Try:
- Repair success rate: repaired / total items brought.
- Estimated waste diverted: approximate weight by category (e.g., small appliances average 2–5kg each; clothing 0.2–1kg each). Choose conservative estimates and document your assumptions.
- Household savings estimate: ask attendees what replacement would have cost (use ranges to avoid over-claiming).
- Skills transfer: number of people who watched/learned a repair step.
Example approach: If you repair 30 items in a session and conservatively estimate an average 2kg diverted per item, that’s ~60kg of potential landfill avoided in one morning. Over 12 sessions a year, ~720kg—before you even count tool library impact.
11) Keep momentum by rotating themes and celebrating “repair stories”
People return when the initiative feels alive. Rotate themes:
- “Back-to-school fixes” (bags, uniforms, lunchboxes)
- “Winter warm-up” (heaters checked by qualified people, draught stoppers, mending knitwear)
- “Bike day” (punctures, brake tuning, chain care)
- “Small furniture rescue” (wobbly chairs, drawer runners, sanding basics)
Community-building tip: Collect short repair stories (one paragraph) with permission: “This belonged to my grandfather,” “This saved me buying a new kettle,” “I learned to sew on a button.” Stories turn a practical service into shared identity.
Quick-start checklist: What you need for your first event
- Venue: accessible, well-lit, tables, power access, toilets
- Core volunteers: host + triage + 2–4 fixers (start small)
- Basic kit: screwdrivers, pliers, multi-meter (qualified use), sewing kit, scissors, glue, clamps, extension leads, PPE
- Process: check-in form + disclaimer + queue system
- Impact tracking: simple spreadsheet or clipboard tally
- Communication: a clear “repair menu” and time window
Conclusion: Repair is community development in disguise
Repair cafés and tool libraries look like waste-minimisation projects, but their deeper impact is social: they build trust, confidence, and everyday connections between people who might otherwise never meet. Start with a pilot, keep the scope manageable, measure what matters, and design the space for learning and conversation—not just transactions.
If Momentum Whangamata is looking for initiatives that strengthen resilience while staying practical and inclusive, repair-and-share projects are a strong next step: tangible outcomes, visible community benefit, and a culture of “we can solve this together.”